 Loading... Please wait...


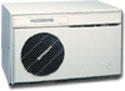
Installing Through-the-Wall AC
Posted by AC-World on December 31st, 2014
One way to stay cool during the summer – especially in isolated rooms or even separate outbuildings such as sheds – is to install an AC unit through the wall. This option can be more secure than trying to use a window-mounted unit. Also, using Through the Wall AC allows you to use your windows however you’d like, which can be a boon on days when it’s too warm to keep the windows shut but not so hot as to run your AC unit.
A basic guide for installing a wall-mounted AC unit (always check the manufacturer’s instructions before starting any work, and consider hiring a professional to avoid accidents or injuries to you or anyone in your household):
Choose a spot, near the center of the room, roughly 24 to 48 inches off the floor, in close proximity to an existing electrical outlet. Make sure the power to the area is shut off before proceeding any further.
Mark the wall studs by using a stud finder and pencil. Position your wall unit so that only one stud needs to be cut. This may not be an option in older houses where stud widths are 12 inches.
Measure the dimensions of the unit and draw them onto the wall using a pencil and level.
Use a router set to a depth of on inch to cut through the interior wall. If you find any electrical wires, contact an electrician for further assistance.
Drill through the corners of your penciled space and then use a saw on the outside of the house to cut through the wall and any 2x4s. Measure, cut and install a 2x4 to fit over the cut studs at the bottom of the opening. Do the same for the top of the opening.
Mount the AC bracket into the wall and apply caulk around the bracket to prevent water or air intrusion.
Slide the AC unit into the opening and secure it according to the manufacturer’s instructions. Caulk any gaps. Cut and install molding.
Plug in the unit and power it on.
Questions? Contact AC World today!